
How to proceed to create your media plan in the database?
Once your media plan is approved by your customer, you must upload it into the database.
How to proceed?
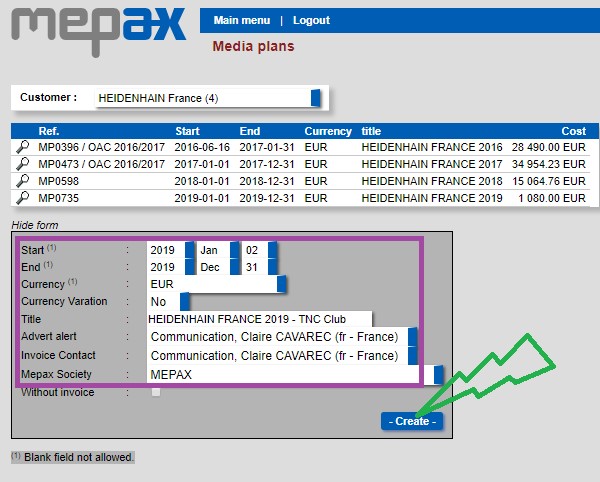
Please go to Main Menu, under Media Info, click on Media Plans. Then by scrolling in the drop-down box select your customer. You directly access previous campaigns, by clicking on the magnifying glass shown below in green you can consult the detail of previous media plan. To create your new advertising campaign, click on “Create a new media plan” as displayed in blue.

Now fill in the general information of your new media plan such as Start & End date as shown below in purple. Click on create in green below.
In the example below, your client Heidenhain approved your offer for one full page in the September issue of L’Usine Nouvelle Magazine:
- Rate Card in red= 14900€ (Mediakit price)
- Cost in blue= 4706€ (Customer cost)
- Net Cost in green= 4000€ (Mepax cost)
- Mepax profit margin= cost in blue – net cost in green= 706€

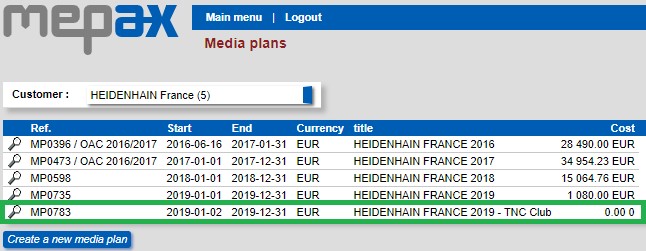
Your media plan interface is created, and you can now open it by clicking on the magnifying glass as shown below in green.
Now you need to fill in the required information: Please note if your media is not in the Top 1000 Media, it will not appear in the purple box below, in this case you need to click on the orange box to find it (click here for other)
- First by scrolling in the 3 drop-down boxes below in purple select your media, issue and advertisement size. Please note, you can select more than one issue at the same time by holding down the control button. Remember this will only work for adverts which are the same size & price.
- When you select your advertisement size the associated rate card will appear automatically below in red.
- You can add a comment as displayed below with the yellow arrow.
- Enter your cost and net cost in blue and green.
- Click on Add this issue in grey.
Repeat the process as many times as necessary to complete the upload of your media plan.

Your first line is now uploaded below!

Please note that if you have made a mistake you can easily remove your line by clicking on R in red below.

The next step is to send the booking order to the media.
To do this please click on “Sending PDF insertion orders auto” as shown below in green. When you have done this your Order status changes from NO to YES below in yellow. Please note that if you click on “PDF insertion orders” below in blue, you can download all the booking orders related to your media plan. Please note, if you delete a line after sending the booking orders, you will need to resend your booking orders once you have re-entered your new line.

Now you need to receive the material from your customer.